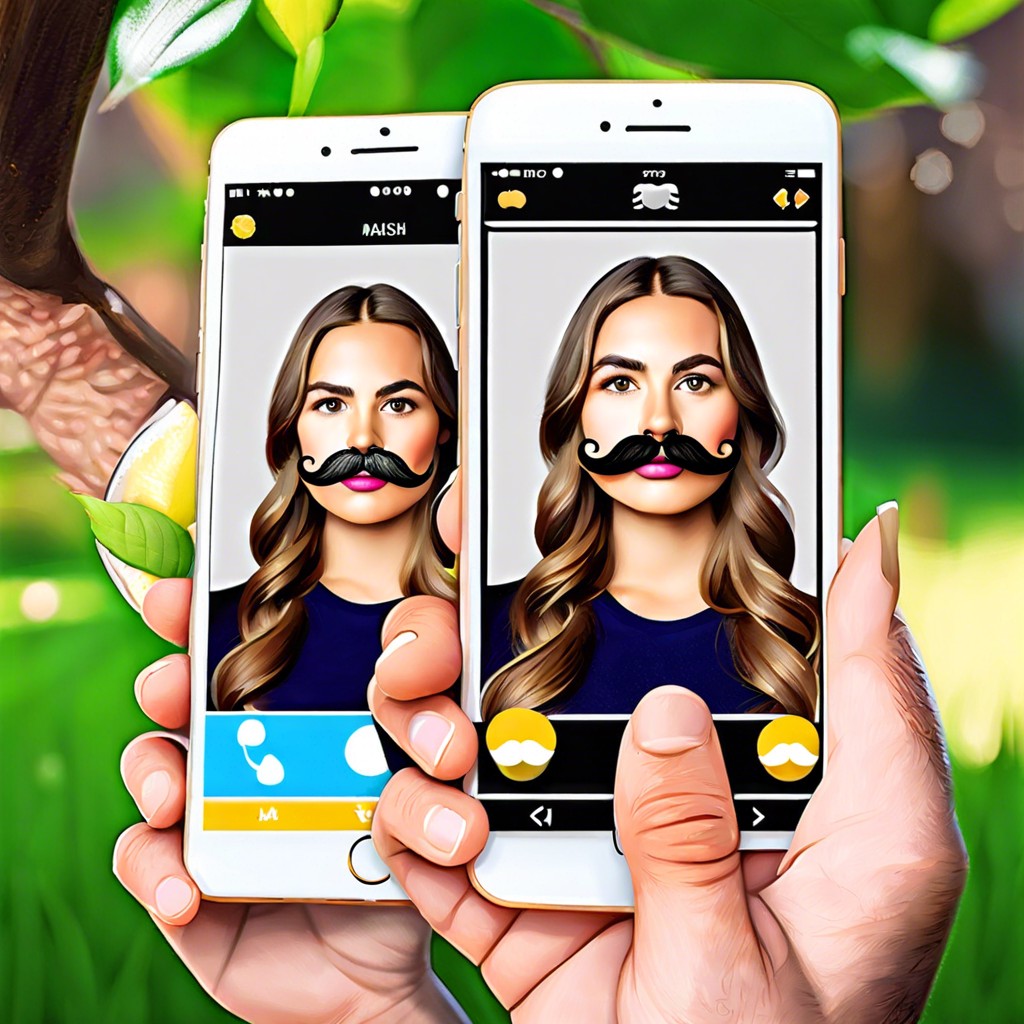
Learn simple steps to add a mustache to your photos using popular photo editing tools.
Dreaming of a dapper mustache but lacking in facial hair? Transform any photo into a mustachioed masterpiece with ease! From picking the perfect app to adding realistic shadows, we’ve got every step covered. Dive in to match, adjust, and stylize—your friends won’t believe their eyes!
Key takeaways:
- Choose a user-friendly photo editing app.
- Match mustache style to face shape and personality.
- Adjust mustache size and position carefully.
- Blend mustache color with hair for realism.
- Add shadows for dimension before saving.
Choosing the Right Photo Editing App

Choosing the perfect app can make or break your mustachioed masterpiece. Not all photo editors are created equal. Some are like fine wine, sophisticated and complex. Others are more like instant coffee, quick and easy.
First up, consider the user interface. You don’t want to spend hours just trying to figure out where the mustache sticker is hiding. Look for apps with intuitive design.
Next, check the mustache options. Some apps come with a surprising array of mustache styles, from the dapper Handlebar to the cheeky Pencil.
Compatibility is crucial. Make sure the app works smoothly with your device, whether you’re team iPhone or Android.
Free or paid, that’s the million-dollar question. Free apps are fantastic for a no-cost fun time. However, premium features in paid apps might give your mustache the extra flair it deserves.
And lastly, read the reviews. Nothing beats the wisdom of the crowd. If everyone’s raving about it, chances are it’s a good call.
Selecting a Mustache Style
Picking a mustache style is like choosing the perfect suit – it has to match your face and personality. Want to channel your inner 70s legend? Go for the Handlebar. Feeling artsy? Try a Pencil mustache.
- Face Shape: Match the mustache to your face. Square faces often suit fuller styles like the Chevron, while round faces benefit from lengthening styles like the Horseshoe.
- Personality: Your mustache should scream you. Bold and brash? Consider a Walrus. Sleek and subtle? The Pencil might be your best bet.
- Context: Think about where you’ll display your new look. A fancy dinner party might call for a sophisticated English mustache, while a casual get-together might be perfect for a playful Dali.
Be bold! Sometimes the wildest styles are the most fun.
Uploading or Opening the Photo
Ready to paint on that killer ‘stache? Open your chosen photo editing app. Make sure your photo of choice is all set.
Navigate to the upload or open file option in the app. This is usually a prominent button—often looking like a camera icon or an upward arrow. Click or tap it like you’re Indiana Jones unlocking a treasure.
Browse your device for the perfect photo. Select your masterpiece in the making. Tap or click to upload.
Now you’ve got your photo loaded up and ready for transformation. It’s time to unleash some follicular magic.
Using the Mustache Sticker or Overlay Feature
Find the mustache sticker or overlay feature in your chosen photo editing app. This is usually located under sections like “stickers”, “effects”, or “overlays.”
First, browse through the available mustache styles. Choose one that matches the vibe you’re going for. Want to channel your inner Tom Selleck? Go for the thick and bushy. Feeling suave? Opt for a pencil-thin mustache.
Next, drag and drop the chosen mustache onto the photo. Position it over your upper lip area. Some apps allow you to adjust the angle of the mustache, making it look more natural.
Play around with resizing. No one wants a mustache that looks borrowed from a cartoon character unless that’s your goal.
Remember, experimentation is key. If you don’t like one style, try another until you achieve the perfect faux-facial hair look. It’s like dress-up for your face.
Adjusting the Mustache Size
Time to tweak! Your majestic mustache needs to be just the right size to avoid looking like it’s about to crawl off your face.
Pinch and zoom. Most apps use a pinch gesture to resize. Super simple.
Precision is key. Too big and you look like a cartoon villain. Too small and it’s barely there. Goldilocks it – find the just-right size.
Symmetry matters. Make sure it’s even. Lopsided stashes are for pirates (unless that’s your vibe).
Pro tip: Check proportions. Your mustache should align well with your nose and lips. No one likes a mustache that’s on a solo adventure.
Positioning the Mustache Accurately
Placement is everything. Too high, and you risk looking like a bizarre eyebrow; too low, and it’s a hairy lip mishap. Start by centering the mustache between the nose and upper lip. Think symmetry; it’s key.
Zoom in for precision. Use guides or gridlines if your app has them. Make sure it’s level, or you’ll look perennially perplexed.
Pay attention to facial angles. A tilted head? Tilt that mustache too. Perspective matters—you’re not placing a sticker on a flat surface. Adjust accordingly.
Consistency in size relative to your face is crucial. A mustache too big can overwhelm; too small can be comical, unless you’re aiming for a Charlie Chaplin vibe.
Matching the Mustache Color to the Hair
Imagine your mustache looking like a wild badger took a nap on your face. Not a great look, right? Consistency in color is key for authenticity and style.
First, use the color picker tool. This handy feature matches the mustache color to your actual hair color. No more clashing tones.
Second, consider lighting. Different lighting can make hair appear lighter or darker. Adjust the mustache color to match the light source for a seamless blend.
Third, use gradient tools. Human hair isn’t just one flat color. Adding subtle gradients to the mustache can give it a more natural, multi-dimensional look.
Remember, details matter. A well-blended mustache can transform your photo from “meh” to “magnificent.”
Adding Shadows and Highlights for Realism
Shadows and highlights make your new mustache look like it belongs. Think of them as makeup for your stache—subtle yet transformative.
First, find the light source in your photo. Where is the light coming from? This is crucial. If the light hits your face from the right, shadows should fall on the left side of the mustache.
Next, use your app’s shadow tool. Lightly shadow the areas opposite the light source for depth. Don’t go wild here; a little shadow goes a long way.
Highlights are the cherry on top. Add small, strategic highlights where the light would naturally hit the mustache. This creates dimension and realism. Make sure highlights are subtle; you’re going for sun-kissed, not disco ball.
Voilà, your mustache now looks like it’s been there all along. Adjust as needed, and watch your photo come to life.
Saving and Exporting the Edited Photo
Every masterpiece deserves to be preserved. Once your photo rocks that dapper new mustache, it’s time to lock it in.
First, ensure you select the highest resolution option. Nobody wants a pixelated mustache—it’s all about clarity.
Next, double-check your file format. JPGs are great for everyday photos, but if you’re expecting high praise on social media, PNGs offer better quality.
Name your file something fun. “Epic Stache” has a better ring to it than “IMG_1234”.
Finally, save it to a reliable location. And hit that save button like you mean it.
Snap. Click. Save. Classic mustache magic, ready for the world.
Sharing Your Newly Mustachioed Creation
Got your masterpiece ready? Time to flaunt it!
Consider these tips:
Choose the right platform: Tailor your share to where your friends hang out – Instagram for glam, Facebook for memories, or Twitter for sass.
Add a snazzy caption: A witty one-liner or pun like “Stache-tastic selfie!” can work wonders.
Tag friends: Especially those who’d laugh the hardest or be most impressed.
Use hashtags: #mustachemonday, #moodymustache, #beardgoals.
Engage: Invite comments with a question, “Thinking of growing this for real?”
Remember to credit the app or tools used, sharing is caring after all!

